")
")
")
")
")
")
The focus of this article is to learn how to do the calculation, detailing, as well as the analysis of the drawings.
Learning how to read professional drawings for furniture projects is pretty easy, and we'll try to learn some of the basics.
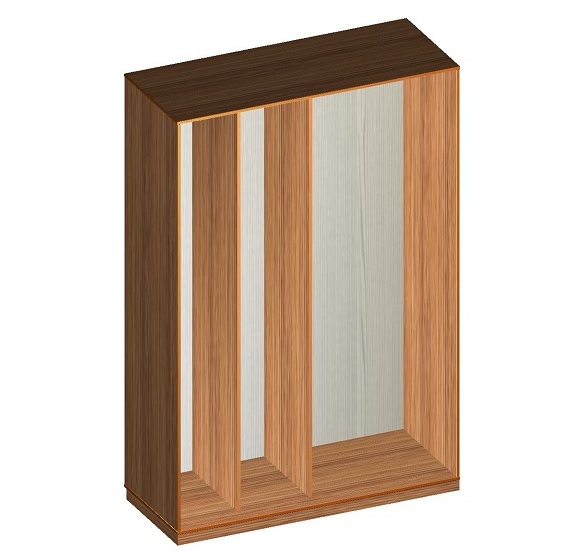
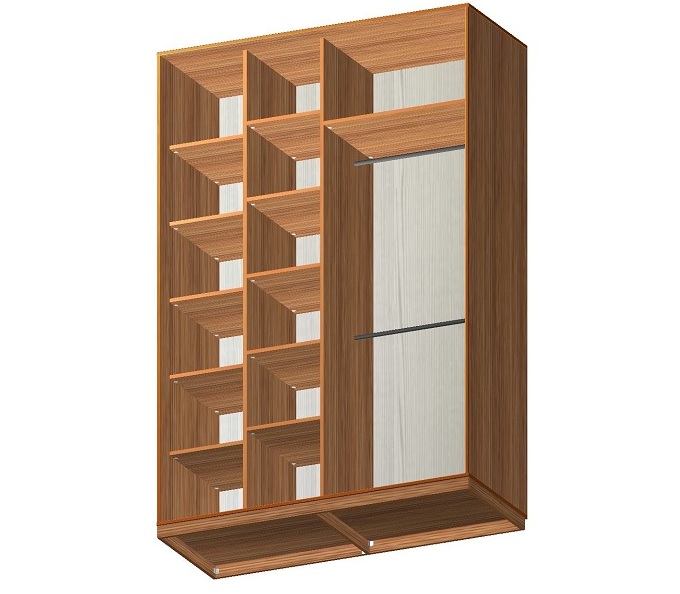
We will make the body of the sliding wardrobe from laminated chipboard.
In order to bring the cabinet to the size we need, you should know the standards for sliding wardrobes and there is a short article on this subject that you should read:
wardrobe design standards.
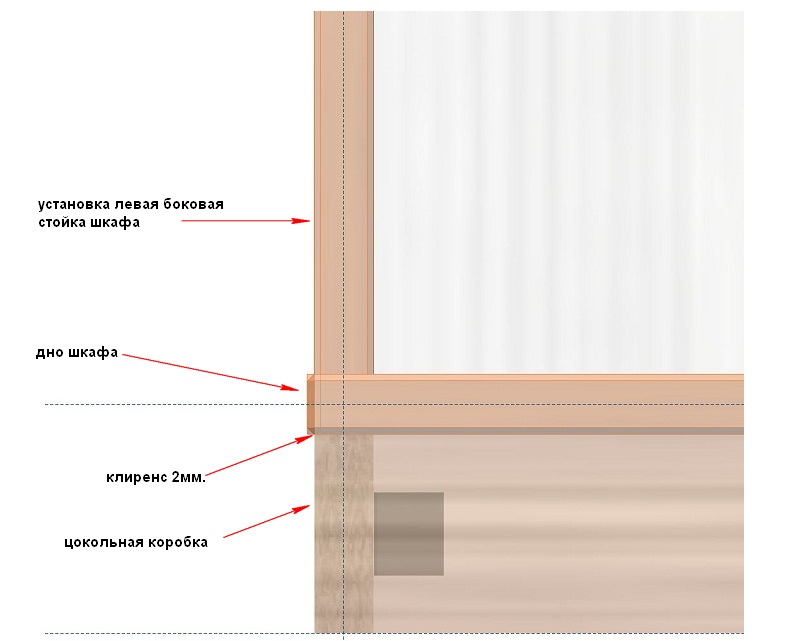
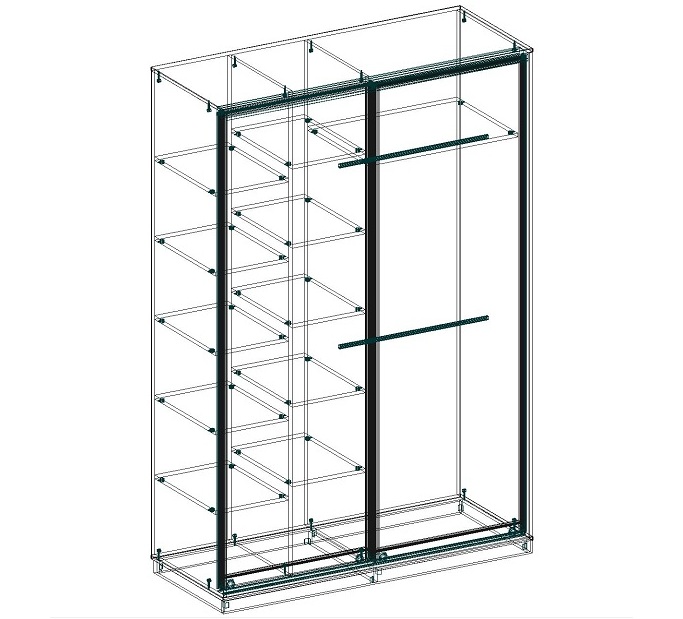
1. Let's start designing with a plinth box - this, so to speak, is a universal plinth design, which furniture craftsmen often use recently, so as not to have problems with cutting under the plinth.
The plinth box (see diagram below) is assembled into a separate structure, 60 - 80 mm high. and is, as it were, the foundation for the wardrobe.
Actually, what problems does the basement box solve? Imagine that you need to design a cabinet adjoining the side and rear walls, and there is a plinth on the floor from these sides. Accordingly, in order to install our cabinet close to the walls without removing the plinth, you need to carry out some tricks that you will see on the diagrams. How exactly does the basement box allow you to bypass the baseboard? - since it is a separate structure, its dimensions in width and depth will be reduced by the thickness of the plinth in the places where the plinth is installed.
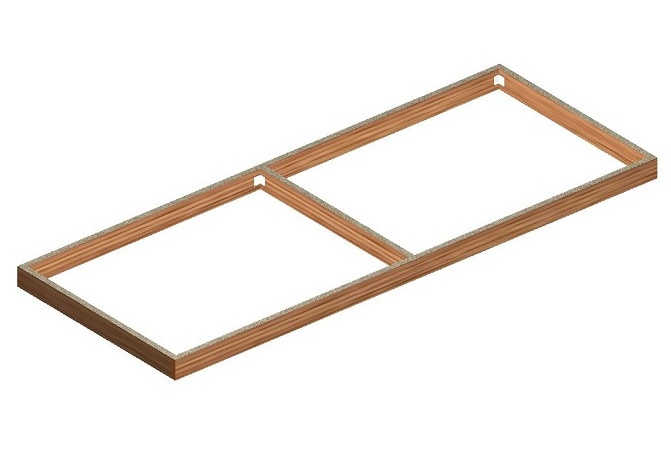
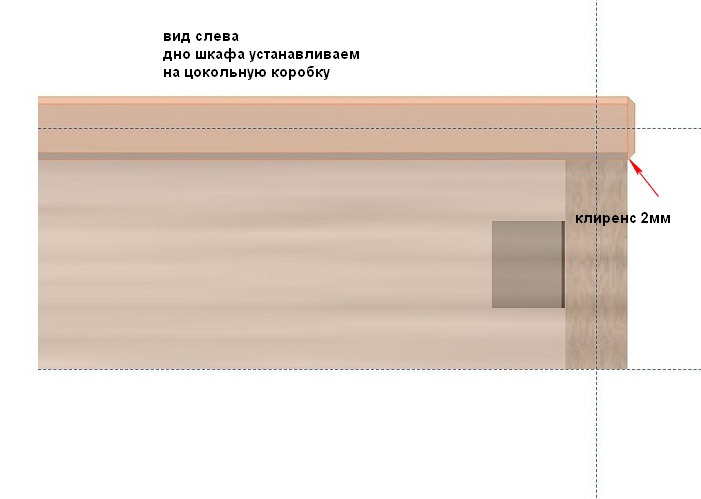
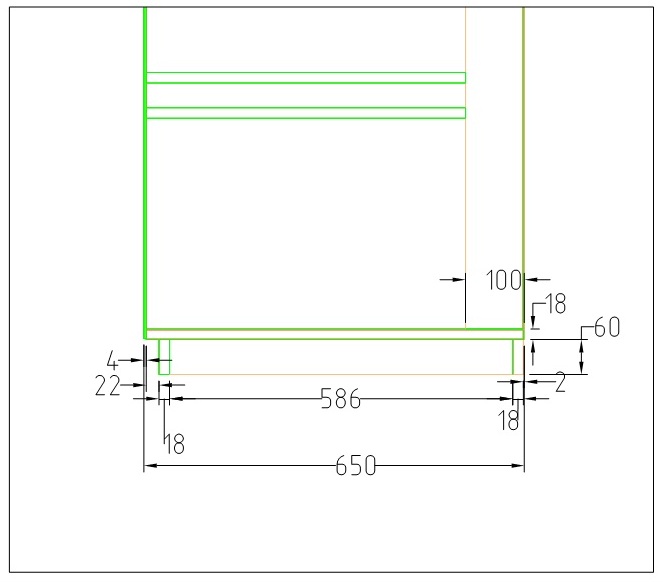
The bottom of the cabinet will rest on top of the basement box and be higher than the plinth, which will allow you to move the cabinet close to the wall.
We set the height of the plinth from the height of the plinth, but not less than 60mm.
2. Let's take the overall height of the sliding wardrobe 2400mm. - this size is acceptable for an apartment with low ceilings, it can also be used for higher ceilings.
The height of the cabinet, as a rule, is always calculated from the height of the ceiling, but has certain limitations:
The height restrictions primarily depend on the format of the laminated chipboard sheet from which the cabinet is made, and the standard format is 2750 x 1830. After sawing the perimeter of the sheet, the height of the part can be within 2700mm . - this is the first limitation.
The next limitation is the compartment door system, which also has its own nuances - the height of the vertical profile and its bearing capacity, as well as the filling of the compartment doors (mirror, chipboard, MDF, etc.) For a high door, you should select a rigid compartment profile, and also take into account dimensions of the material filling the door.
All these points are known by professionals and often recommend the most correct sizes to clients in order to avoid the above problems.
3. The depth of the cabinet is determined by the size of the room, for example, in a narrow corridor there will be depth restrictions that will affect the internal structure of the cabinet, and in a spacious room we can set the minimum depth - 650mm. For your information, you should know that a compartment system for two or more doors takes up 80 - 100mm of cabinet space, which accordingly sets the internal space of 650 - 100 = 550mm.
It should be noted that the depth of the cabinet is 550mm. enough to comfortably accommodate shirts and other clothing except for outerwear. Outerwear may well fit in this size, but it is better to design 600mm.

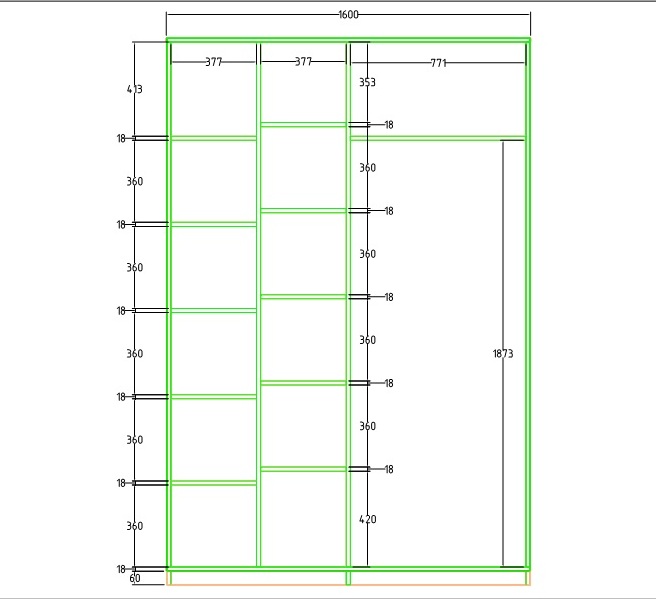
So, the overall size of the designed sliding wardrobe will be determined as follows: 2400mm (height) x 650 (depth) x 1600 (width)
Width 1600mm. adopted arbitrarily, based on two sliding compartment doors.
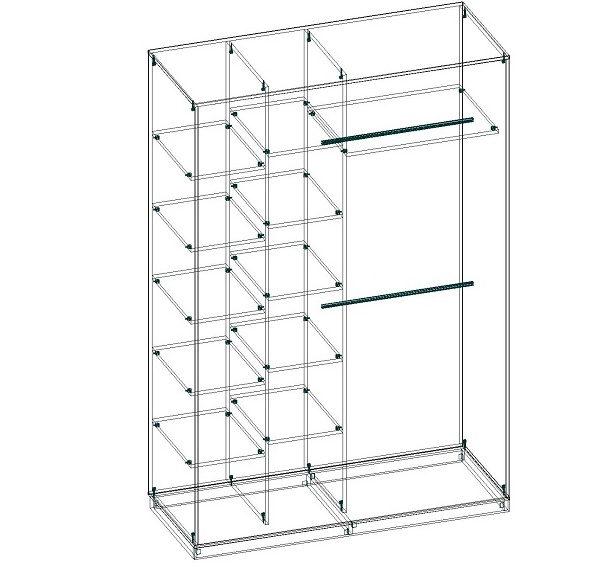
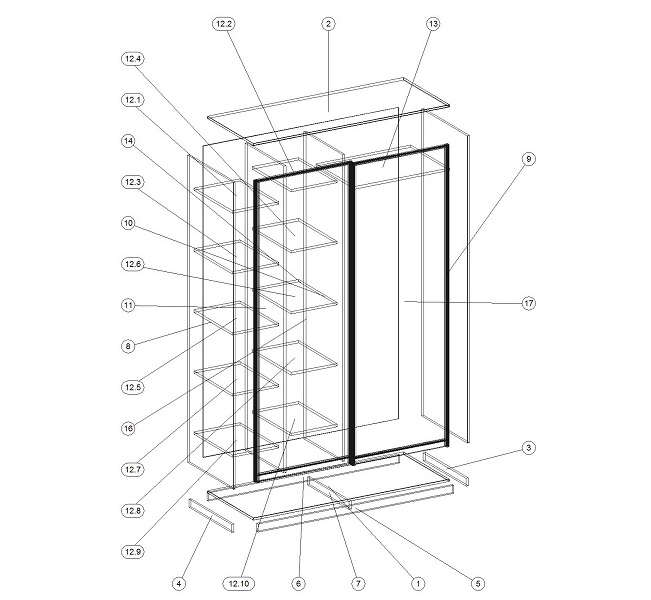
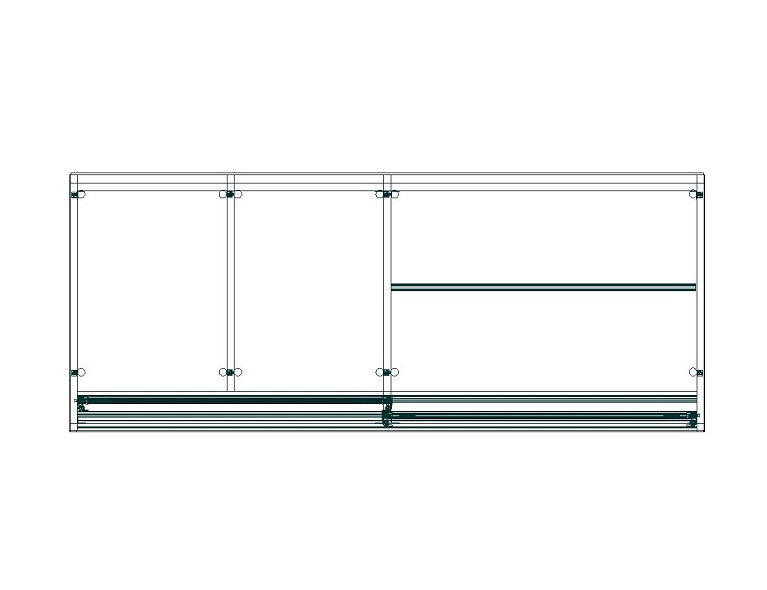
Taking into account all the above points, we plan the internal structure of the cabinet:
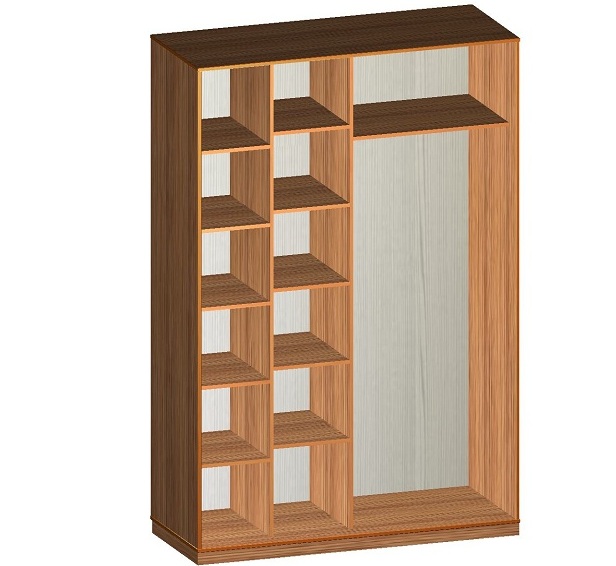
Since there are two compartment doors, it means two sections separated by a central partition, each of which can be individually designed to suit the needs of the client. On the left side we will make shelves, and on the right side we will place two bars for hangers.
Having the necessary information, let's start the calculation:
Plinth box:
item No. 5 (sideboard) cabinet overall width 1600mm. - (minus) 4mm. clearance = 1596mm., (1600 x 60 x 18);
detail No. 6 (side cabinet) overall width of the cabinet 1600mm. - (minus) 4mm. clearance - (minus) 36 (two side parts 18 + 18) = 1560mm., (1560 x 60 x 18);
detail No. 3; 4 (bulkhead) cabinet overall depth 650mm. - (minus) 2mm. clearance - (minus) 26mm. indentation on the plinth - (minus) the thickness of the front side 18mm = 650-2-26-18 = 604 (604 x 60 x 18);
detail No. 7 (bulkhead) overall depth of the cabinet 650mm. - (minus) 2mm. clearance - (minus) 26mm. indentation on the plinth - (minus) the thickness of the front and back sides 36mm. = 650-2-26-36 = 686mm. (686 x 60 x 18);
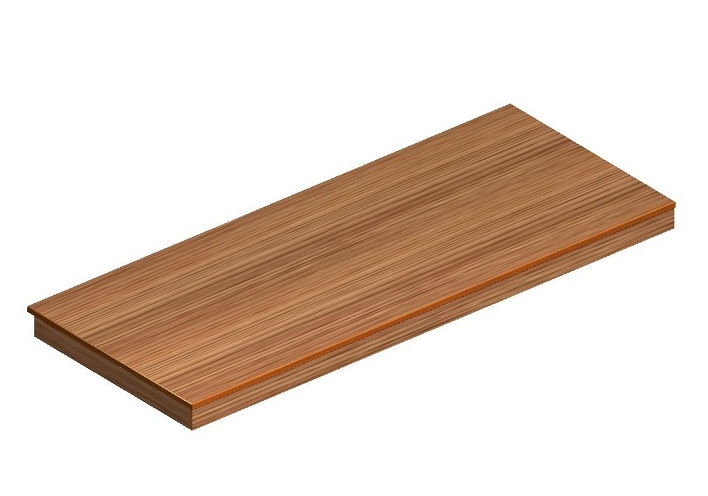
Outer bottom:
item No. 1 overall width of the cabinet 1600mm.; overall depth of the cabinet 650mm. (1600 x 650 x 18);
Side walls (bulkheads):
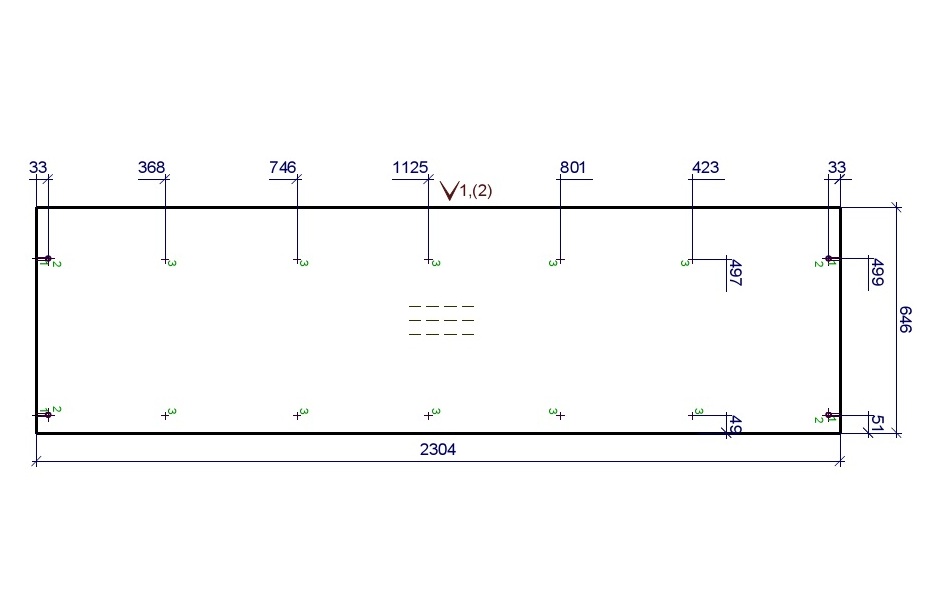
detail No. 8; 9 (bulkhead) cabinet overall depth 650mm. - (minus) 4mm. rear wall of fiberboard. = 646mm.; cabinet overall height 2400mm. - (minus) 36mm. (roof, bottom) - (minus) 60mm. plinth = 2400-36-60 = 2304mm. (2304 x 646 x 18);
Internal walls (bulkheads):
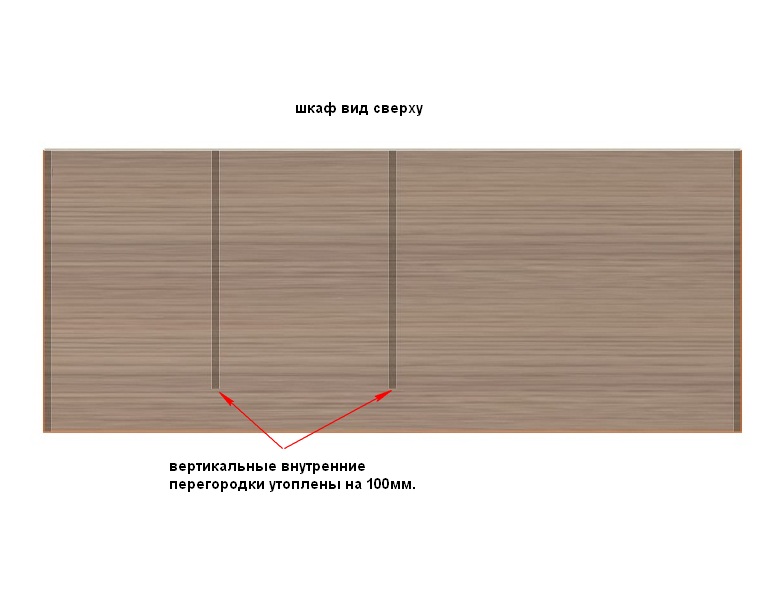
Internal bulkheads should be 100mm thick. indented inside the cabinet to leave space for installing a compartment system.
detail No. 10; 11 (bulkhead) cabinet overall depth 650mm. - (minus) 4mm. rear wall of fiberboard. - (minus) 100mm. = 546mm.; cabinet overall height 2400mm. - (minus) 36mm. (roof, bottom) - (minus) 60mm. plinth = 2400-36-60 = 2304mm. (2304 x 546 x 18);
Shelves:One can argue about the multi-level placement of shelves, but for the universality of the choice of assembly fittings, this method is the most optimal. What does this mean? - there is a "hidden" fitting, it is not visually visible from the face of the product, but there is a "visible" one, such as a confirmation, therefore it is the choice of fittings, the ability and experience of the furniture master that determines the method and level of fastening the shelves.
part No. 12.1-12.10; (shelf) width, cabinet overall width 1600mm. - (minus) 54mm. lateral and central partitions (18+18+18). (minus) - 4mm. ground clearance = 1600-54-4 = 1542mm. /(divide) 2 = 771mm. received the internal dimension of the left and right sections of the cabinet;
771mm. - 18mm. bulkhead No. 11 (separating the left section) / (split) 2 \u003d 376.5 \u003d 377mm .;
the length is equal to the width of the bulkhead No. 11 = 546mm. (377 x 546 x 18);
detail No. 13; (shelf) width, equal to 771mm. internal dimension of the right section of the cabinet;
the length is equal to the width of the bulkhead No. 10 = 546mm. (771 x 546 x 18);
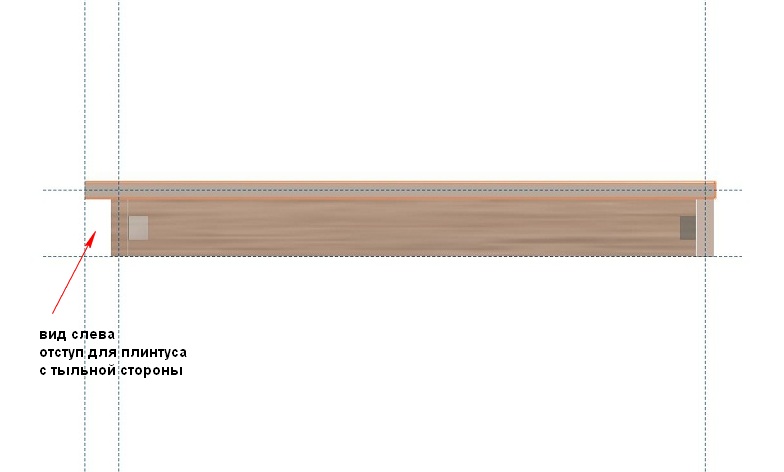
Back wall of fiberboard: cabinet overall height 2400mm. - (minus) 60mm. base - (minus) 4mm. technological indents = 2400-2-60 = 2336mm.
overall width of the cabinet 1600mm. - (minus) 4mm. clearance - (minus) 4mm. technological indents = 1592mm. (2336 x 1592 x 4);
According to the calculations, we have the overall dimensions of the parts, and we should also pay attention to the PVC edge.
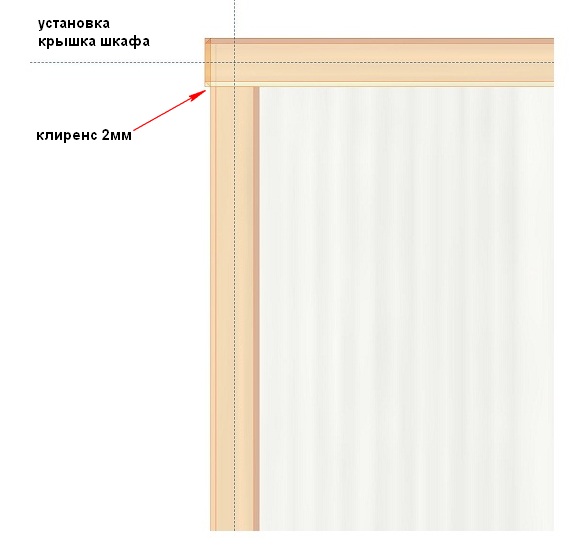
We will veneer the ends of the front elements of the sliding wardrobe with a 2 mm thick edge, therefore, it is always necessary to take into account the size of the part, both saw and overall, and make adjustments to the calculations when cutting the chipboard.
In our project, the edge is 2mm thick. we will veneer the roof, the bottom on three sides and the right and left bulkheads along the face, this will be enough, and veneer all other parts with an edge 0.5mm thick.
As was the description in the previous article - for an edge of 0.5mm. usually no corrections are made and the saw and overall dimensions of the part are assumed to be the same, although 1 mm runs on both sides of the part, but this is not critical for cabinet furniture.
Now let's learn how to read professional drawings.
As a rule, all self-respecting furniture companies work using drawings, with the help of which they seat (drill furniture blanks) the necessary furniture fittings, glue the edge and assemble the furniture.
It is worth noting that many furniture masters do not make drawings, but given many years of experience and the necessary knowledge base, they add parts according to the scheme that is already in their heads and this method works.
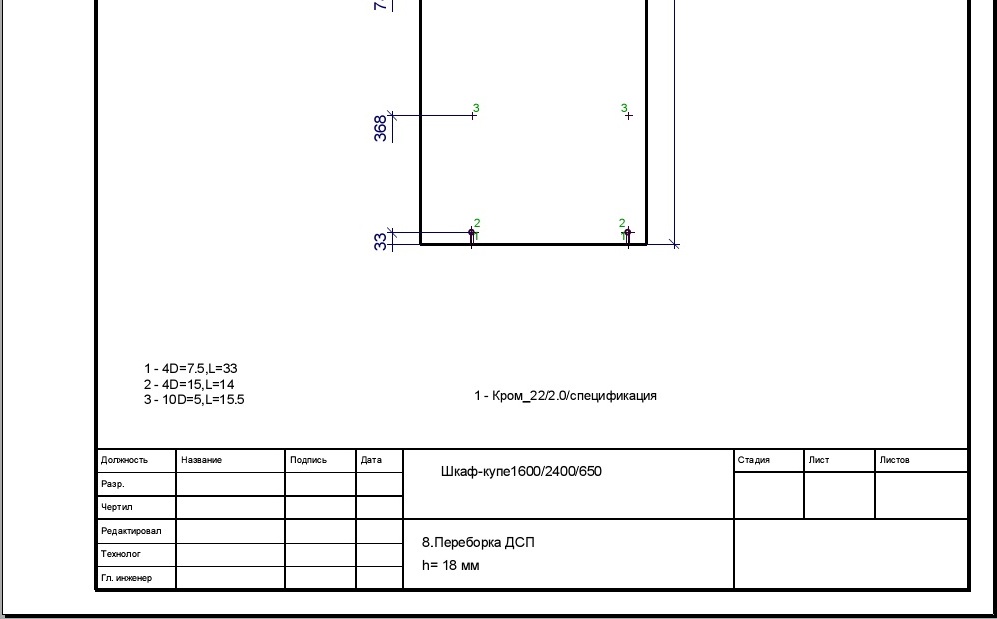
So, for example, the drawing of the left bulkhead No. 8 - we make a screen to increase the area we need.
We have the following set of numbers and symbols:
1-4D=7.5 L=33
2-4D=15 L=14
3-10D=5 L=15.5
1-edge_22/2.0/
specification =33)
1- serial number, which is located, as a marker directly, at the point where the drilling operation will be performed;
4 - the number of holes that are in the drawing required for drilling;
D - hole diameter = 7.5mm;
L - hole depth = 33mm;
Having this information, we conclude that such drilling operations are performed under the minifix dowel from the end of the short side of the part.
Next hole (2-4D=15 L=14)
2 - serial number, marker at the point where the drilling operation will be performed;
4 - the number of holes that are in the drawing required for drilling;
D - hole diameter = 15mm;
L- hole depth = 14mm;
Therefore, this is a drilling operation for the minifix head.
Now we know how the minifix additive works.
Be sure to remember that the addition of furniture fittings is carried out only with a blank lined with PVC edges, since the thickness of the edge is 2 mm. can shift the specified size.
1-edge_22/2.0/specification
In this case, it is easy to guess that the number 1 indicates the edge number, and the position on the detail drawing indicates the side on which the edge is glued.
22/2.0/ is the width of the edging and its thickness.
specification - a specific edge color can be specified here.
Here is actually a brief educational program and we can already read a professional drawing.
In conclusion, it is also necessary to have information about what size of the part is indicated on the drawing - saw or overall?
The next step is to assemble the closet.
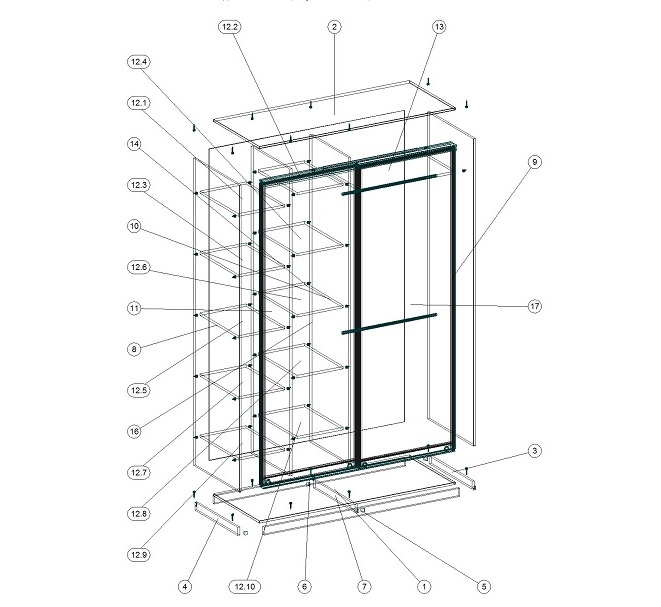
The diagrams and the specification show which assembly fittings are used in this product, and for brief reviews on fittings and its additive, see the article -
Strictly according to the drawings, we add assembly fittings and proceed to the assembly of the cabinet. First of all, we assemble the basement box, then we attach it to the bottom of the cabinet.
Next, install the vertical racks and the roof.
Now you can safely install the shelves.
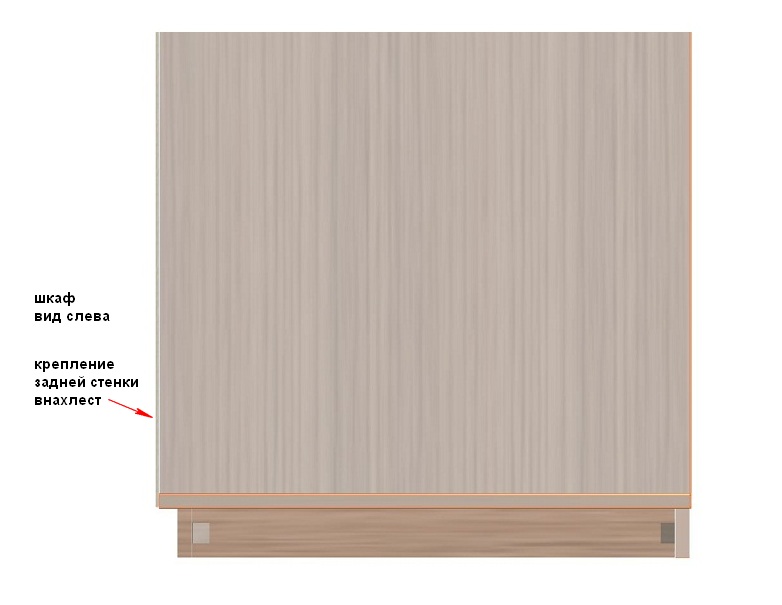
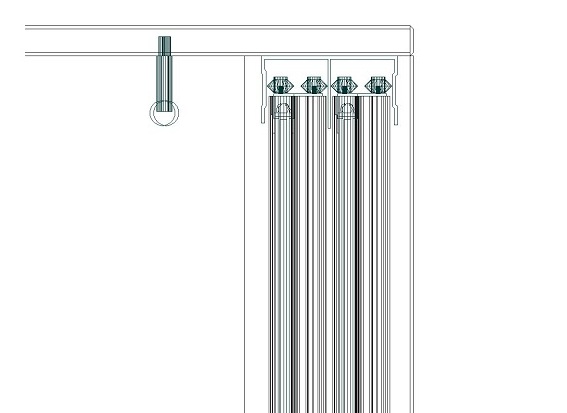
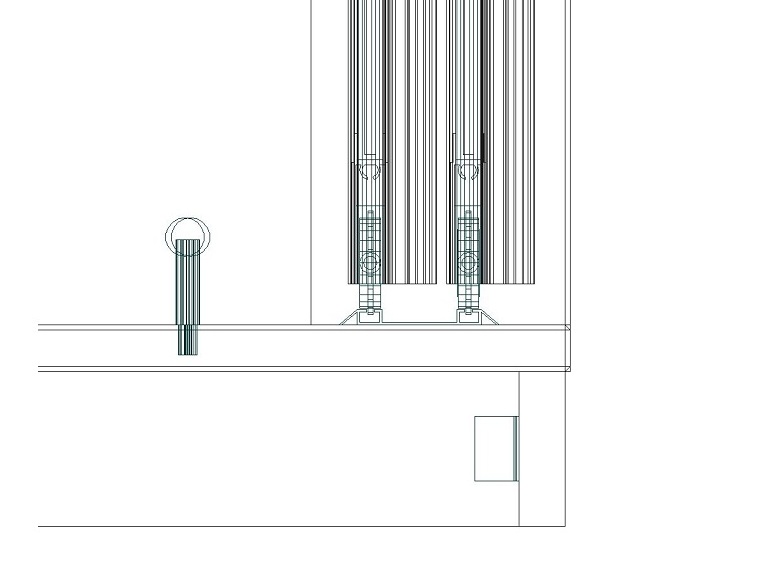
Particular attention should be paid to nailing the back wall of the fiberboard.
The correct geometry of the cabinet depends on this process, that is, shifting a couple of millimeters from the vertical, the design of the sliding wardrobe will be broken and it may be difficult to adjust drawers or doors.
To do this, perform the operation of attaching the rear wall in the following order:
1) - mark and draw lines on the part along which furniture nails will be nailed.
2) - nail the part to the end of the cabinet roof.
3) - nail fiberboard to the end of the left, and then the right side wall from top to bottom, maintaining a clear line of indentation along the perimeter.
4) - nail to the end of the bottom of the cabinet.
5) - nail to the shelves and the central rack.
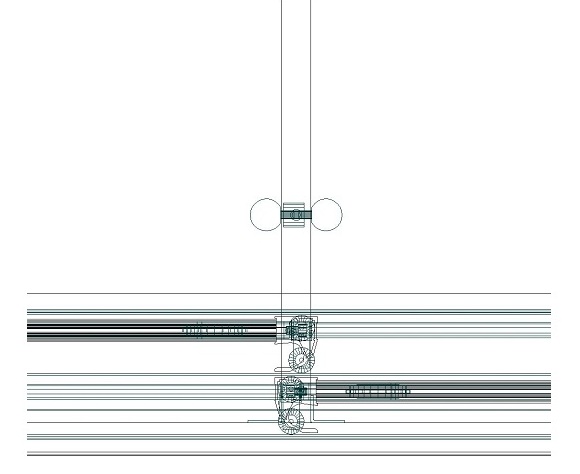
Next, we proceed to the installation of compartment doors.
Sliding doors are also a separate topic that requires serious attention and knowledge that can be gleaned from the articles:
Cabinet drawings in .PDF format Полный комплект деталей с присадкой.
Specification for fittings and board materials in .PDF format Спецификация.
Schemes in .PDF format Схемы.
Comments powered by CComment